In previous, we learned how we can forensics of RAM using Volatility Framework. Now Volatility is a command line based tool (CLI) now we are going to learn how we can do the same using graphical user interface (GUI). Here we are gonna use Evolve to make Volatility GUI from CLI on our Kali Linux system.
First of all Volatility comes with Kali Linux repository, we can easily install it by using sudo apt install volatility command. But in this case we are afraid that this method of installation might not work here easily. So first we need to clone the Volatility Framework on our system by using following command:
After that, Volatility will be downloaded on our system as we can see in the following screenshot:
Now we need to navigate under the volatility directory by using following command:
Now we install it by using following command:
After providing our sudo password it will be installed on our system, as we can see on the next screenshot:
Once it completed we need to install some requirements to make it GUI, we run following four commands to do so:
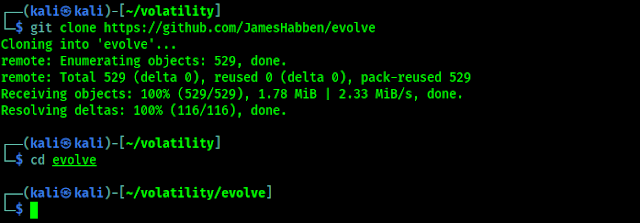
After then we need to clone Evolve from GitHub by using following command:
Here we need to clone evolve inside of volatility directory otherwise it will not gonna work, then we need to navigate inside evolve by using cd evolve command. As shown in the following screenshot:
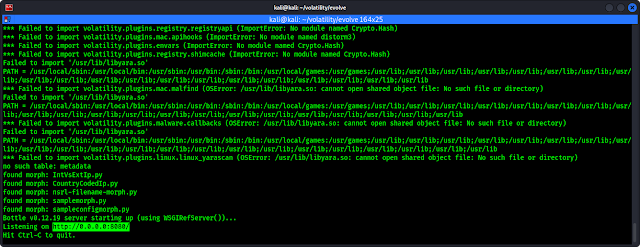
Now we can analyze our acquired memory (RAM) on GUI. We have an sample of acquired memory on our Desktop (named cridex.vmem) to analyze. We can do it by simply using following command:
We can see the output of the applied command in the following screenshot:
In the above screenshot we can see the localhost link where Evolve is running. We need to open this link on our browser to use Evolve, the web-based GUI of Volatility. We opened the link on our browser and loaded the pslist plugin of Volatility in the following screenshot:
We can see the plugin of Volatility on the left-hand side bar, even we can search for plugins. On the output we also can search for something in the result. To know more about Volatility Framework and the works of it's plugins during Digital Forensics please check out our Volatility forensics tutorial.
Extra Talks
Volatility and Evolve both using Python2 and Python2-pip so we need to use python2 and pip2 commands. It will be good to make sure to run python2 -V and pip2 -V commands to check if they are working properly.
We also ignored some errors while installing pip2 modules and running evolve, but it works like a charm.
Evolve makes Volatility a Graphical User Interface tool from a Command Line Interface tool, which helps a lot for GUI lovers. Also the search options are grate. During forensics testing these search options helps a lot to find something inside these huge data.
This is how we can use Evolve and use Volatility as GUI tool on our Kali Linux system. Memory Forensics Testing is very crucial to know for Digital Forensics expert as well as cybersecurity experts. Hope this tutorial helps.
Love our articles? Make sure to follow us on Twitter and GitHub, we post article updates there. To join our KaliLinuxIn family, join our Telegram Group. We are trying to build a community for Linux and Cybersecurity. For anything we always happy to help everyone on the comment section. As we know our comment section is always open to everyone. We read each and every comment and we always reply.


