In this detailed article we learn "How to install Nessus on Kali Linux 2020.x". Nessus is a very popular and widely used vulnerability scanner and assessment tool for testing web application and mobile application.
Nessus will be very helpful for penetration testers and bug bounty hunters. Nessus also helpful for web and mobile app developers to find and fix vulnerabilities.
Nessus is always updated and useful libraries for vulnerability and configuration checks. Also it's analysis is very fast and accurate.
Key-Features of Nessus
- The latest intelligence, rapid updates, an easy-to-use interface.
- Covers an industry-leading 50,000+ vulnerabilities.
- Network devices: Nessus can audit firewalls/routers/switches (Juniper, Check Point, Cisco, Palo, Alto Networks), printers, storage.
- Virtualization: Nessus also can audit Virtual Systems like, VMware, VirtualBox, ESX, ESXi, vSphere, vCenter, Hyper-V, and Citrix Xen Server.
- Operating systems: Nessus can run against Windows, Mac, Linux, Solaris, BSD, Cisco iOS, IBM iSeries.
- Databases: It will scan inside various databases like, Oracle, SQL Server, MySQL, DB2, Informix/DRDA, PostgreSQL, MongoDB
- Web applications: Nessus can find vulnerabilities in Web servers, web services, OWASP vulnerabilities.
- Cloud: We can use Nessus to scans cloud applications and instances like Salesforce and AWS et.
- Compliance: Helps meet government, regulatory and corporate requirements. Nessus also will be useful for personal and development uses.
Installing Nessus on Kali Linux 2020.x
Nessus doesn't comes pre-installed with Kali Linux, so we need to download and install it manually.
Nessus vulnerability scanner package is available for download in Tenable's site. This is the official download site for Nessus.
We download the 64 bit version for our Kali Linux system. It will be saved on our Downloads folder. So we open the terminal there and run following command to install Nessus on Kali.
Then it will start installing as shown in the following screenshot:
Okey, It is now installed. Let's check if the installation is correct and Nessus is working or not.
First we enable Nessus service by using following command:
This command will enable nessusd services. After this we can start this service by using following command:
Then we can check if it is running successfully or not via applying following command:
If everything will be perfect then it should show outputs as following screenshot.
In the above screenshot we can clearly see that Nessus service (nessusd) is active and running successfully.Now we can run this. We need to open our web browser and navigate to https://localhost:8834 here we might got security warnings form browser but we can ignore it, because it is our localhost.
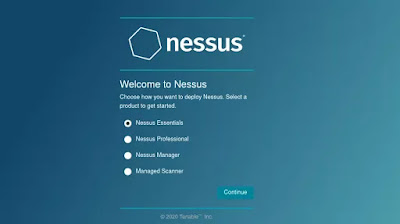
So we go to Advanced and processed to localhost.Then we reach the beautiful Nessus Setup, as shows in the following screenshot:
Here we can "Continue" with "Nessus Essentials". Then we got a form asking about our details like name and e-mail id. Here we need to provide a original e-mail id because Nessus will verify it. So we fill it and click to
Then we click on "E-mail" and an "Activation Code" will be send to our given e-mail id.
Now we give the "Activation Code" and click on "Continue", in the following screenshot we have hided our activation code.Then we need to create user by creating username and password for login.
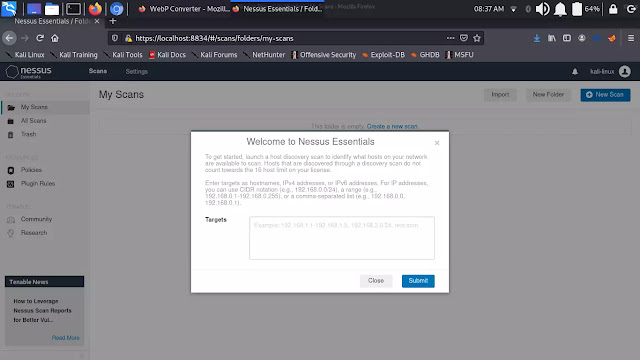
Then we can login. After login we see the front page of Nessus.
Here we can submit our targets. Targets like hostnames, IP address (IPV6 or IPV4), to scan the target. We can put networks here to scan.
Similarly we can close this and click on "New Scan" to add targets, here we got lots of options as we can see in the following screenshot.
From here we can scan our targets and know about it's vulnerabilities.
Nessus is very useful for security researcher and it is very easy to use it. So in this tutorial we learned how we can install Nessus on Kali.
We can stop Nessus service on our system after using it by applying following command:
To start it again we can use:
Then we just can go to https://localhost:8834 for Nessus.
Nessus also have a Paid Professional version to know about it please check this.
Love our articles? Make sure to follow us on Twitter and GitHub, we post article updates there. To join our KaliLinuxIn family, join our Telegram Group. We are trying to build a community for Linux and Cybersecurity. For anything we always happy to help everyone on the comment section. As we know our comment section is always open to everyone. We read each and every comment and we always reply.


